Thursday, October 31, 2013

Estee Lauder Stay Flawless, Double Wear Light Review & Autum Photoshoot Photos

UPDATE: Once I put it on at 9AM, and fell asleep at midnight with it on, I woke up at 3AM and it still looks good, so this is very long lasting!!!

After taking Bridal Make Up course in Taiwan, I realized how important foundation is in photos. Before, I would just apply my tinted sunscreen and concealer. Well it usually works since most people have told me I have pretty nice skin. However, for photos, you want your skin to look even smoother, flawless and even.

So returning to NYC, I went to Macy's with my mom and picked out my first foundation! I went to Estee Lauder since I had some good experience with their make up. The sales lady immediately recommended me their Double Wear Light foundation after examining my skin type. But the indecisive me decided to test all their foundation on my hand, parts of my face and when that wasn't enough, my mom's too. The sales man came along and when he heard I wanted it for photoshoots, he recommended the regular Double Wear foundation (comes in a bottle instead of the tube like the light). When he applied both on my skin, I couldn't tell much of a difference. However for hygienic purposes, I chose the Light one instead of having to use something to scoop some of the regular one each time.


Turns out to be a great choice as this foundation had a special set that came with a pretty gold brush to match the cap, concealer and a matte perfecting primer. Perfect way to break into the foundation world for me! Plus it was only about $5 extra. I got intensity 1.

From left to right: bare skin - primer & foundation - applied concealer on spots and under eye.
It gave a nice light, and sheer coverage, covering my blackheads and pores and lighten up stray eyebrows. It also brighten up my complexion a bit. The concealer was enough to cover most of the pigmentation of my blemishes, but not heavy enough to cover my dark circles. So I would have to find one to use with this. 

The brush's quality is quite good, however it did leave a bit of streaks so be sure to blend well with it!


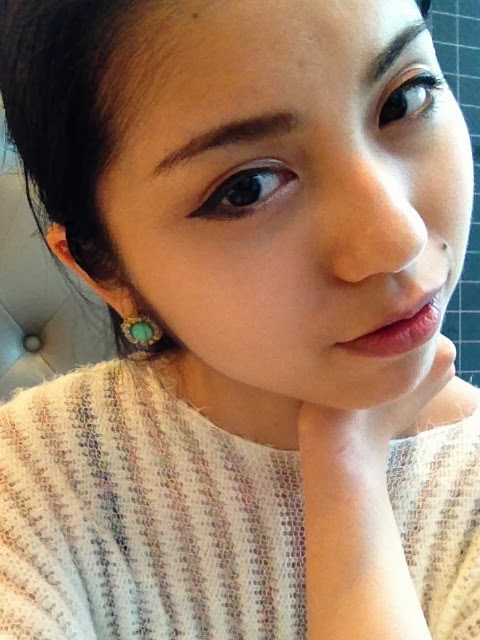
Then off I went to photoshoot! Here is how the color looks in natural light and after a few hours of application. What I love about it is it doesn't settle in the lines by my nose/mouth. Not sure what it's called? :/ Many foundation does that to me, but due to the light texture of this one it didn't! LOVEEE!! Will definitely be purchasing another set when I'm almost done with mine ;)


Here are the two looks I did side by side. One was a lighter angelic look for my white lingerie ensemble and the other a sexier look with a corset. Will be filming a tutorial for this soon as it's been requested by a few friends ;)


Lastly how it looks on a professional camera! How did I shoot lingerie on a cold 50 degree autumn day? Simple, I do what I love :D More photos from the shoot will be added when I receive it. 


My outfit of the day! What upsets me the most is my waist looks nice in photos, but I feel like in preson it is not :( Time to hit the gym today before checking out the Halloween parade!

Monday, October 21, 2013

Josie Maran Argan Love Your Lips Hydrating Lipstick in Playful Pink

I was invited by a friend to attend Martha Stewart's American Made Market event on Thursday, October 17, 2013 since she worked there. I was mainly convinced by her because Josie Maran's makeup artists would be there to give free makeovers.


I arrived just when they were finishing and packing up so missed out having one of their makeup artist giving me a make over, but my friend who worked there saved a lipstick sample for me. It's the first Josie Maran product I've used. I heard about her but never tried out her items.

Josie Maran Argan Love Your Lips Hydrating Lipstick in Playful Pink
The packaging is really sleek and beautiful. I love the rose gold tube. And even the lipstick itself is really cute - the layer of Argan oil around the lipstick color core. Not only is the product's look beautiful, but the actual product on is beautiful.


As you can see my lips before is dry, and when applied only on the bottom lips you can see the difference already. When applied on the full lips, it makes it juicy and glossy. It really does what it says shine of a gloss and moisturizing benefits of a balm. The only thing I don't think it really does is the high pigmentation of lipstick. Maybe the pink color is closer to my lips so I don't see a difference. Either way I do love how it makes my lips look and feel!


It looks almost the same when lined up with my Canmake and Estee Lauder lipsticks. However, it is the most glossy one out of the three. The Canmake was really dry and hard to put on, while Estee Lauder was smooth to putt on but more matte finish.

I loved the lipstick, but it is $22 for full so I'm not sure if I would buy another one, unless there is a color I really want to get (which is a nudy peachy coral!!!).

Here is photos from the rest of the event.

Decorative hole punching table. The butterflies are so fun and cute!
Toyota was one of the sponsors and you get free candy and totebag.
A NYC coffee shop offered free cups of coffee to try and it was pretty good.
And of course, Mathra Stewart's book signing time!
Overall it was a fun and relaxing event. 

Friday, October 11, 2013

{ Start of the Fur Season } Fur x Leather x Knit

I am back from my trip to Taiwan and can finally blog again!


Just when I returned, the season has rapidly changed from summer to cold, windy autumn. But hey, I'm not complaining. I got to dig out my clothes adorned with my favorite Autumn / Winter item - fur, or as I like to call it Mao Mao.


I also tried using my new double sided eyelid tape for the first time today on my left eye - the eye with double crease. It was due to my naive self in high school where I played with my eyelids, lifting and then dropping it to create double crease. It looked nice and big then, reminding me of Ayumi Hamasaki's eyes. However, it has decided to stick with me and I am not too thrilled.

On my right eye, the "normal" eye, I still have to use eyelid tape but for this I cut my own from a 3M tape roll. I learned this method in Taiwan, something I've wanted to learn since I saw Chinese make up artist do it for me. Everyone's eye shape and lid is different, so you have to cut accordingly. For me, I just a need a short piece to tape to the front of my eyes to raise my lid to match my left. It's troublesome to have to fix both eyes now, but hey you got to do what you got to do right?


Top - Korean boutique
Jacket - Just Cavalli
Earring - Korean Boutique
I love these lighted up stairs!! I used it as a backdrop the first time on birthday last year.

judy.